An interesting feature in Windows Azure is the possibility to expand the local network to the Cloud. This feature comes in two options, a site-to-site tunnel can be created, as well as a simple client VPN, or point-to-site connection. A site-to-site tunnel is configured on a firewall device or router within the corporate network, essentially connecting the Cloud like any other remote site.
This post is about clients connecting to the Cloud, so called point-to-site VPN connections. This feature might be of less interest to corporate customers, however, I find it quite cool for lab and dev/test scenarios.
Azure Virtual Network
To get started we need to configure a virtual network in Windows Azure, chances are that if you have been using Azure virtual machines, you might already have a virtual network configuration. It is required to have VMs communicate with one another.
So, in the management portal, create a new virtual network using the “Custom Create” option.
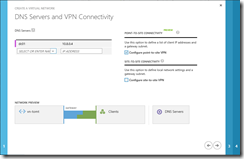
After specifying a Name and Affinity Group, configure the DNS Server, this will be the DNS Server for the virtual machines in this virtual network.
A quick hint: Azure virtual machines cannot be configured with static IP addresses, but the address assignment always starts with .4, so the first virtual machine that is started will get the .4 address. I do make sure to start my DNS server before starting anything else.
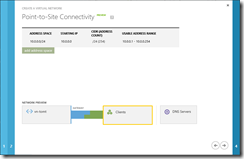
Since we are configuring point-to-site VPN, we need to check the corresponding check box. In the next screen we are configuring an IP address range that will be used by the virtual network. This is not yet the subnet for the VM, it is just the address range within which the individual subnets will be created.
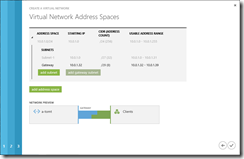
And in the last screen we are actually configuring the subnets. We need one ore more subnets (within the address range configured before) for the virtual machines, as well as a “Gateway subnet”. This subnet will be used for the gateway.
Once the virtual network has been created, we need to add a subnet for the VPN clients that will connect to the virtual network. This is done using the “Configure” tab in the virtual network’s properties.
The last step is to create the gateway, using the “Create Gateway” button in the “Dashboard” tab of the virtual network. This process creates the required configuration within Windows Azure, an IP address and a hostname are assigned for clients to connect.
Voila, that’s it from a network configuration point of view.
Authentication
Now when Clients are connecting to a VPN some form of authentication is required, in our case of point-to-site VPN, the Azure virtual network uses an SSTP connection with certificates for authentication.
The first step is to upload the Certification Authority’s certificate (public key) to the virtual network. Certificates issued by this CA can then be used to authenticate and connect to the VPN. I am using my lab CA and had to install the CA certificate in my clients “Local Machine” trusted root store.
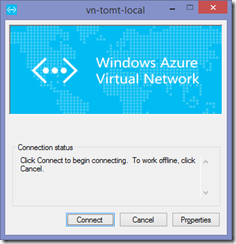
After uploading the CA certificate, I requested a new certificate for my user account (using the “User” template). In order to connect to the virtual network in the Azure Cloud one last step is required, we need to download the Client VPN package which is available in the “Dashboard” tab in the virtual network configuration. The installation is simple and once installed, a new VPN connection will be available.
And that’s it. Now I am able to connect my notebook to the Azure virtual network, making it possible to connect “directly” to the VMs running in the Cloud :)
A quick ipconfig shows that my client got an IP address from the address range I configured earlier, the DNS servers have been assigned, too.
Ok, enough for tonight, time to get my head out of the clouds :-)
Tom


