Today I’ve got a fun one, we’re going to use Azure Functions to build a Telegram Bot with PowerShell. Sounds interesting? Well here we go. Before diving into the technical details, lets have a quick overview of what we’re trying to do.
A Telegram Bot is an application that runs inside Telegram; users can interact with a Bot by sending them messages (or commands). The bot’s administrator controls the bot through a https-based API.
Azure Functions is a serverless platform that lets us run pieces of code (functions) without worrying about the infrastructure. It’s called serverless because we just deploy code, no need to install virtual machines or applications. Azure functions support different programming languages, one of them is PowerShell. It’s still in experimental state, but it works just fine for what we’re going to do.
So yes, we’re going to hook up our bot with a function app running PowerShell code in Azure.
Azure Functions
In order to deploy our Azure Function, we have to login to the Azure Portal and create a new resource. Select the “Serverless Function App” which is currently listed in the Popular section of the marketplace, if it doesn’t show up, search for “Function App” and click Create.
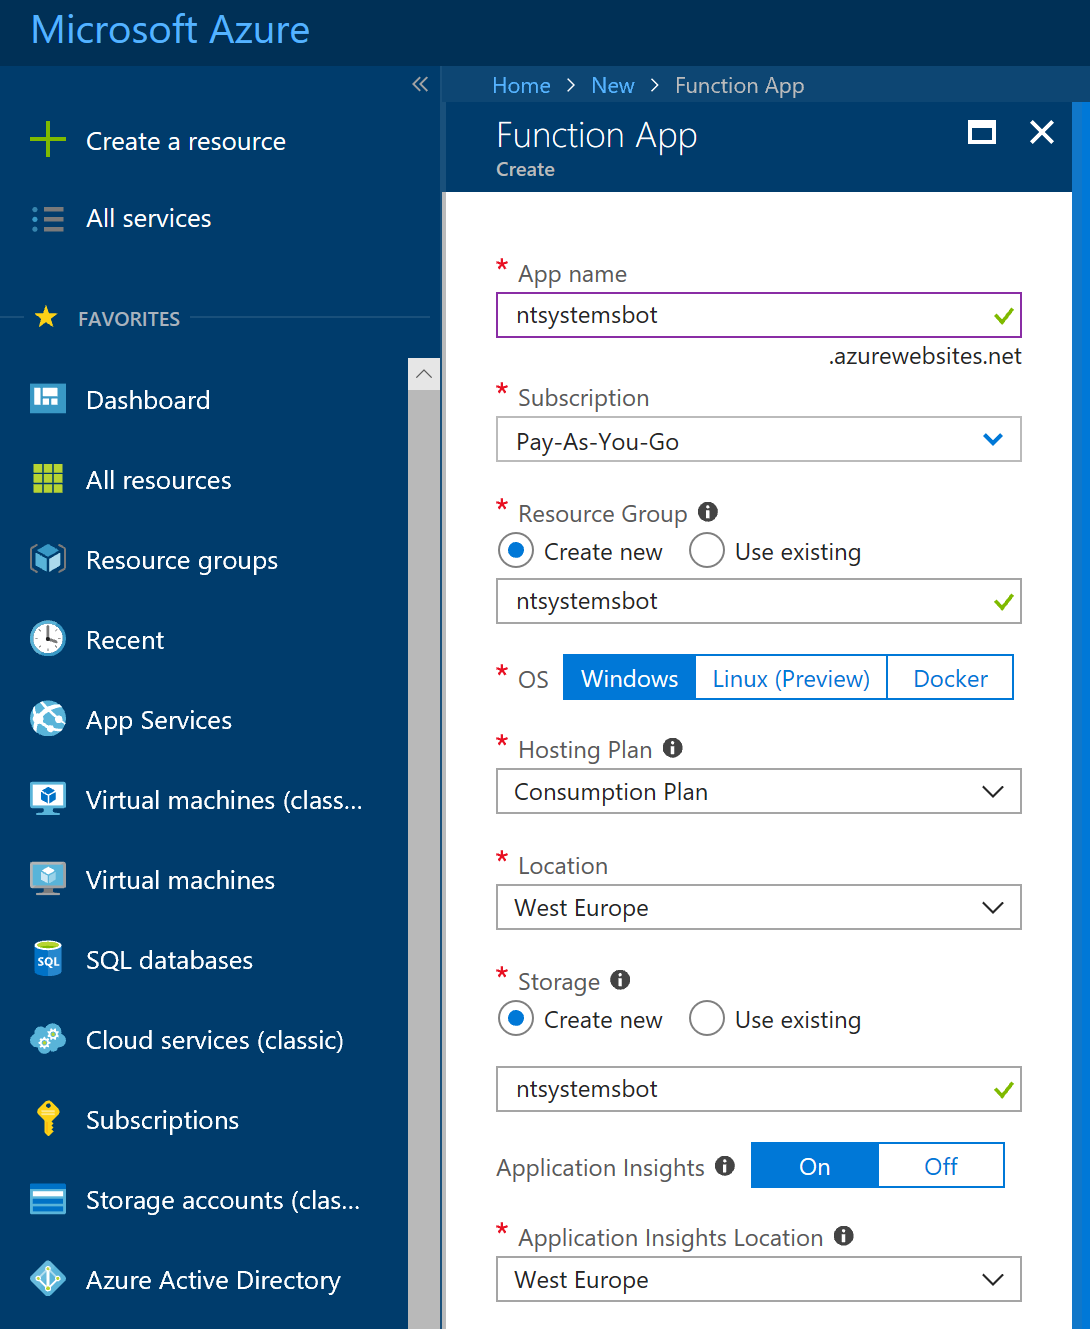
We’ll have to give a name to our app and select a storage account and location for the deployment. Once the deployment is finished, we can find the application through the All resources button on the left side in the Azure portal. Click the function app and add a new function. As noted before, PowerShell support is still experimental, so we have to create a new custom function, enabling the “Experimental Language Support”.
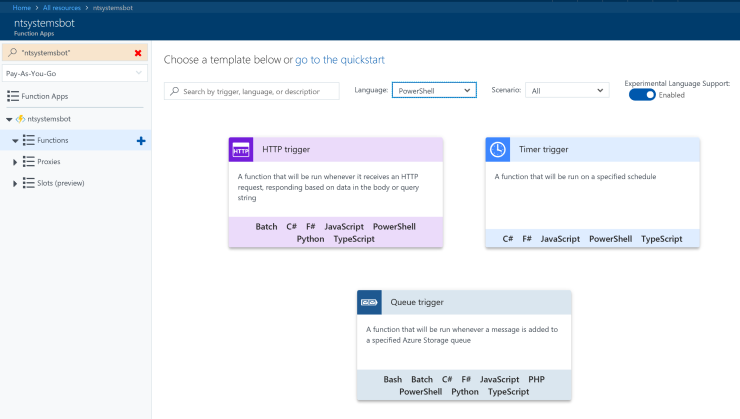
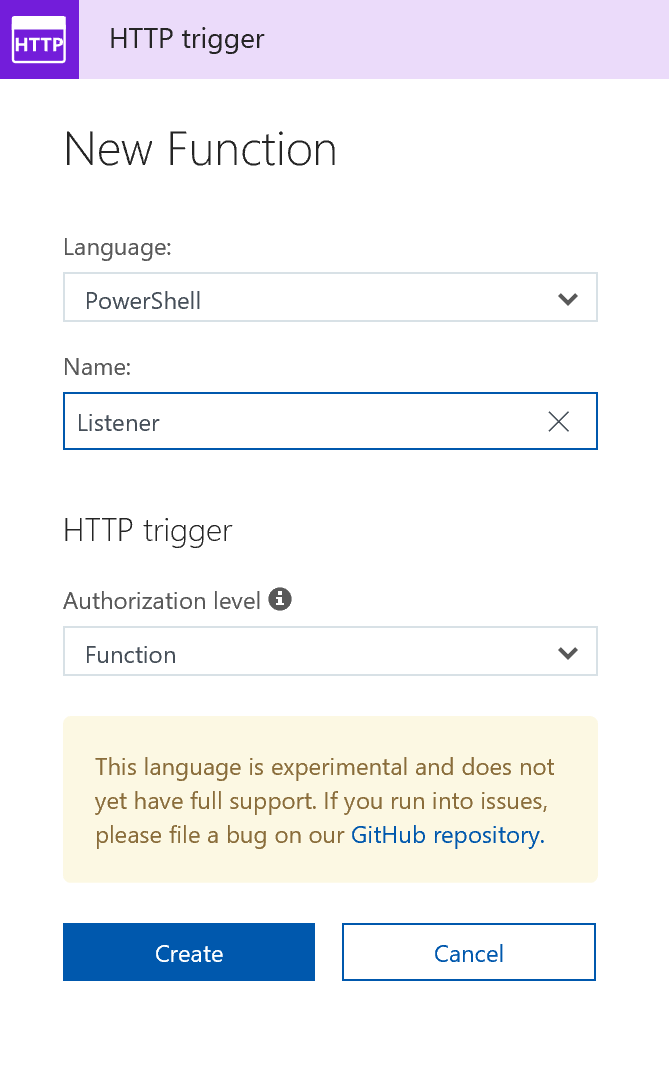
Functions can have different triggers as well as various inputs and outputs. For our example, we’ll go with the “HTTP trigger” function. This function will run whenever it receives a HTTP request. Set the Language to PowerShell and the Authorization level to Function.
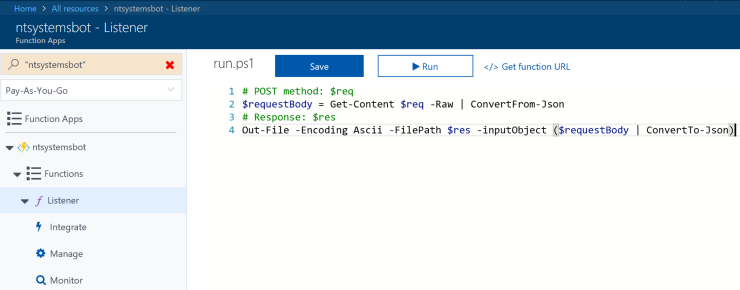
The function is created with some basic code to get started, I’ve changed it a bit so that it will just return the object we pass to it.
# POST method: $req
$requestBody = Get-Content $req -Raw | ConvertFrom-Json
# Response: $res
Out-File -Encoding Ascii -FilePath $res -inputObject ($requestBody | ConvertTo-Json)
Please make note of the function URL, right there next to the Run button. Remember that we selected an Authorization level of Function when creating the function, so we need to use a key when calling the function. This makes sure, that only our bot can call the function.
To test the function, we can use Invoke-RestMethod to send a POST request:
[PS] C:\> Invoke-RestMethod -Uri "https://ntsystemsbot.azurewebsites.net/api/Listener?code=WaaxxyA==" -Body '{"Name": "Tom"}' -Method Post

Name
----
Tom
Ok, so now that we’ve got a working function, let’s go ahead and create the bot.
Telegram Bot
To create a Telegram bot, well, we use a bot. Look up the @BotFather account and follow the instructions.
For this basic example, it was enough to specify a name and account name:
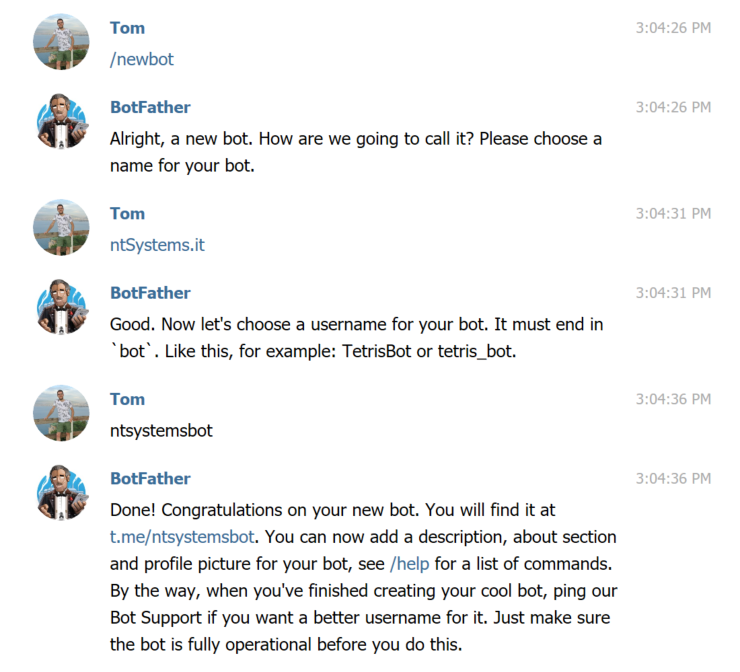
The BotFather will guide you through the process and, at the end, give you access token for the http API. To edit the bot after the fact, just use the /myBots command. To test the access token and verify the bot has been created, we can call the following URL:
https://api.telegram.org/bot<AccessToken>/getMe
Replace <AccessToken> with the actual token, just like that:
[PS] C:\> Invoke-RestMethod -Uri "https://api.telegram.org/bot528059907:AAxxVs/getMe"

  ok result
  -- ------
True @{id=550258749; is_bot=True; first_name=ntSystems.it; username=ntsystemsbot}
Ok, now we should have a working Azure function app and a barebones Telegram bot. Continue to part two for the next steps.