In this post, we build on the Nano Servers that were set-up in the part one, we are going to create a Failover Cluster and enable Storage Spaces Direct.
Cluster Network
When creating the Nano Server vhd files, I did add the package for failover clustering by using the –Clustering parameter of New-NanoServerImage. So now that the servers are running, I can use remote server management tools or PowerShell to create a cluster.
But, before doing that, I went ahead and configured the second network adapter with static IP addressing. Remember that I created the Nano VMs with two network adapters, one connected to my lab network – where DHCP provides addressing – the other connected to an internal vSwitch, as it’ll be used for cluster communication only.
Failover Cluster
Before creating a cluster I run the “Cluster Validation Wizard” to make sure my configuration checks out. We could run that wizard using the GUI tools or using the following line of PowerShell:
Test-Cluster –Node n01,n02,n03,n04 –Include “Storage Spaces Direct”,Inventory,Network,”System Configuration”
Some summary information as well as the location of the html report will be printed to the screen. In the report we can actually see the results of the tests that were run. Problems are pointed out and some level of detail is provided.
The only warning I got was the following: Failed to get SCSI page 83h VPD descriptors for physical disk 2. This was because my VMs originally used the default “LSI Logic SAS” controller for the OS disk, while the additional, 100GB disks were connected to the SATA Controller. To fix this, I did connect the OS disk to the SATA Controller as well.
All green, so we can go ahead and create the cluster:
New-Cluster -Name hc01 -Node n01,n02,n03,n04 –NoStorage
This will create another html report at a temporary location, the path will again be printed to the screen. My cluster has an even number of nodes, so I decided to use a File Share Witness. Using the following commands, I created a quick share on my management server (tp4):
New-Item -ItemType Directory -Path c:\hc01witness
New-FileShare -Name hc01witness -RelativePathName hc01witness -SourceVolume (Get-Volume c) -FileServerFriendlyName tp4
Get-FileShare -Name hc01witness | Grant-FileShareAccess -AccountName everyone -AccessRight Full
After that, I used the following to update the cluster quorum configuration:
Set-ClusterQuorum -Cluster hc01 -FileShareWitness \\tp4.vdi.local\hc01witness
Storage Spaces Direct
At this point, we have a running cluster and we can go ahead and configure storage spaces.
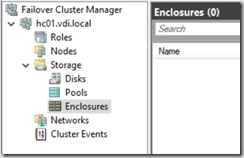
But again, before doing that, I want to point something out. If we open the Failover Cluster Manager at this point, we can connect to the cluster just as we are used to. If we expand the “Storage” folder in the newly created cluster, we can see there are no Disks, no Pools and no Enclosures present at this time.
Using the following command, I enabled storage spaces direct for the cluster:
Enable-ClusterS2D -S2DCacheMode Disabled -Cluster hc01
And using the following command, I create a new storage pool using the “Clustered Windows Storage” subsystem:
If we go back to the Failover Cluster Manager after the above steps, we can see that now there is a Pool as well as four Enclosures, one representing each server:
Ok, so far it is looking quite good, and we can go ahead an create a volume (or virtual disk):
Our new virtual disk will automatically be added to the Cluster Shared volumes, we can verify that using:
Get-ClusterSharedVolume -Cluster hc01
Alright, we are getting close. In the next post, we are going to configure the Hyper-V roles and create some virtual machines. Sounds great? Stay tuned :)
Cheers,
Tom


