This post is the follow-up to the one about AD and topology preparation and I will again use screenshots to walk through the Installation and Certificate request and assignment processes.
DNS Records
The last post ended with publishing the Topology, after that, the wizard provides a simple To-Do list, summarizing the next steps. Creating the DNS records for our Simple URLs was one of them. So, using DNSmgmt.msc I created CNames for the meet, dialin and lyncadmin URLs, all pointing to the Lync Front End Server.
The DNS Records used for automatic sign-in are not mentioned in said To-Do list, though. I created the sip.tomt.local record as just another alias pointing to the Lync FE Server. Automatic Sign-in also needs the following Service Location Record (SRV)
_sipinternaltls._tcp.tomt.local SRV service location:
          port           = 5061
          svr hostname   = lyfe01.tomt.local
All in all, I do now have the following DNS Records:
| HostName | RecordType | RecordData |
| _sipinternaltls._tcp | SRV | [0][0][5061][lyfe01.tomt.local.] |
| lyfe01 | A | 10.1.1.11 |
| dialin | CNAME | lyfe01.tomt.local. |
| meet | CNAME | lyfe01.tomt.local. |
| sip | CNAME | lyfe01.tomt.local. |
| lyncadmin | CNAME | lyfe01.tomt.local. |
Server Prerequisites
The next step is to install the prerequisites on the Lync Server, for more information check TechNet. I use the following PowerShell cmdlet to install Lync Server prerequisites, make sure you specify a “–Source”.
Add-WindowsFeature NET-Framework-Core, NET-Framework-45-Features, RSAT-ADDS, Web-Server, Web-Static-Content, Web-Default-Doc, Web-Http-Errors, Web-Http-Redirect, Web-Asp-Net, Web-Net-Ext, Web-ISAPI-Ext, Web-ISAPI-Filter, Web-Http-Logging, Web-Log-Libraries, Web-Http-Tracing, Web-Windows-Auth, Web-Client-Auth, Web-Basic-Auth, Web-Filtering, Web-Stat-Compression, Web-Dyn-Compression, Web-Mgmt-Console, Web-Scripting-Tools, Web-Request-Monitor, NET-WCF-HTTP-Activation45, Web-Asp-Net45, Web-Mgmt-Tools, Web-Mgmt-Compat, Desktop-Experience, Telnet-Client, BITS, Windows-Identity-Foundation –Source ‘D:\sources\sxs’ –Restart</code>
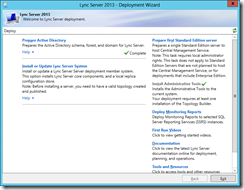
Now after the reboot open Lync Deployment Wizard again and click "Install or Update Lync Server System"
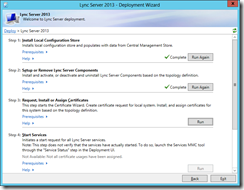
After installing Local Configuration Store and Lync Server Components, we need to request and assign Certificates for Lync to use.
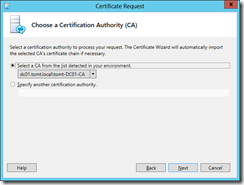
If you use an online (enterprise) CA, select send request immediately, if you intend to send the request to a public CA, select the offline certificate request option. As I have ADCS installed in my test forest, I use the enterprise CA for this.
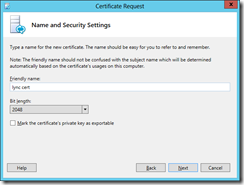
Optionally specify credentials and a certificate template, if your current user has permissions to request a certificate using the “WebServer” template, click next. Then specify the friendly name for and the key length for the certificate.
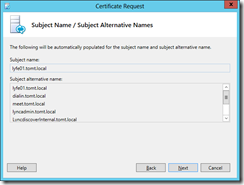
Lync automatically includes the required Alternative Names along with Simple URLs and external pool name. Other details (such as City, Country, Region) typically used in certificate requests can be specified too.
Select the SIP Domains, so that they are included, too. You can optionally add additional SANs, I didn’t need any more than the ones included by the wizard.
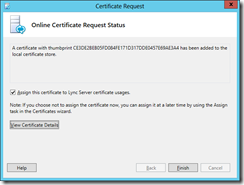
Request the Certificate and tick the “Assign this certificate…” checkbox.
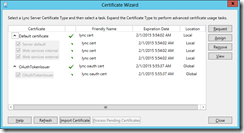
If you plan to use Server-to-Server authentication (Office Web Apps, Exchange, SharePoint) also request an OAuth Certificate. The procedure is the same as for the Server certificate.
The OAuth Certificate is a "Global" Certificate, that means that Lync Central Management Store replicates it to all Lync Servers, and all Lync Servers will use the same Certificate for OAuth.
Starting the Services
Phew, now after all those steps, we can finally go ahead and start the services. Give it some time, and check if all services are started using services.msc.
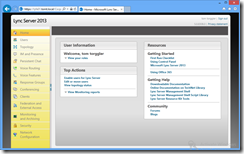
Now, we can use Lync Server Control Panel to check out our work. I prefer to use the Control Panel on my client PC, as it requires Silverlight to be installed. So, on a Computer sporting Silverlight, open the Simple Administration URL specified before.
I will continue to test some features of Lync 2013, stay tuned for more!
so long, have a nice weekend!
tom
