The Windows Subsystem for Linux can be used to run quite a few interesting things on Windows, one of them is the Invisible Internet Project or i2p.
Install i2p
First of all we’ll have to install i2p on our system. Before starting the installation, we have to add the required repository:
sudo apt-add-repository ppa:i2p-maintainers/i2p
sudo apt-get update
sudo apt-get install i2p
After the installation we can start the i2prouter with the following command:
i2prouter start
As soon as the service is running, we can access the homepage using http://127.0.0.1:7657/home likewise the configuration page is available at http://127.0.0.1:7657/config
Configure Proxy
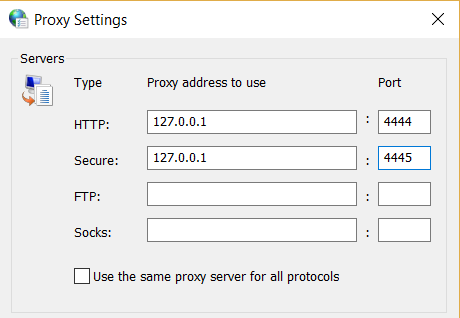
For testing, we don’t have to change anything in the home or configuration pages and we can just point our systems proxy configuration to i2p. The i2prouter listens on ports 4444 and 4445 for http and https traffic, respectively.
Now you will soon notice that pointing your system’s proxy to i2p will allow you to browse .i2p sites but the “clear” intertnet will no longer work very well.
Unlike tor, i2p is not intended to be used as proxy to the internet, but it’s purpose is to enable secret communication to resources inside the i2p network. Therefore it does not make a lot of sense to route all internet traffic trough i2p, it’s enough if we use the i2prouter to access *.i2p domains.
Install Privoxy
To get that done, i.e. routing only requests to .i2p domains to the i2prouter, we’ll need another small proxy that is capable of routing requests based on pattern. Let’s install privoxy:
sudo apt-get install privoxy
After installing privoxy, we’ll have to configure it so that it routes requests to *.i2p domains to i2prouter which runs at localhost:4444:
Use your favorite editor to update the config file at /etc/privoxy/config and add the following line:
forward .i2p localhost:4444
Now restart privoxy sudo /etc/init.d/privoxy restart and set the systems proxy configuration to 127.0.0.1:8118.
Setting the proxy with PowerShell and PAC
Constantly changing the proxy configuration does not work really well, I forget that I’ve set the proxy and if privoxy is not running, I have to disable the proxy in order to access the internet. In the first iteration, I wrote two quick and dirty PowerShell functions to enable/disable the proxy settings:
Function Disable-Proxy {
    $reg="HKCU:\Software\Microsoft\Windows\CurrentVersion\Internet Settings"
    Set-ItemProperty -Path $reg -Name ProxyEnable -Value 0
    Set-ItemProperty -Path $reg -Name ProxyServer -Value ""
}
Function Enable-Proxy {
    param($proxyServer = "localhost:8118")
    $reg="HKCU:\Software\Microsoft\Windows\CurrentVersion\Internet Settings"
    Set-ItemProperty -Path $reg -Name ProxyEnable -Value 1
    Set-ItemProperty -Path $reg -Name ProxyServer -Value $proxyServer
}
I put these in my $PROFILE and used them for a few days. It was ok, but there had to be a better solution… So I started to look into PAC or “Proxy auto-config” which is a configuration file that defines how web browsers can automatically choose the appropriate proxy server. Read more on Wikipedia
Long story short, I ended up using the following configuration file:
function FindProxyForURL(url, host) {
        // .onion URLs need a proxy:
        if (shExpMatch(host, "*.onion"))
        {
                return "PROXY localhost:8118";
        }

        // other requests go directly
        return "DIRECT";
}
Save the function above to a text file called proxy (without extension) and put it in C:\Windows\system32\drivers\etc\ and set the systems AutoConfigUrl to: file://C:/Windows/system32/drivers/etc/proxy
Enjoy Tom