With digital certificates being the de-facto standard for authentication, a handy enrollment model is key (pun intended). Microsoft included it’s NDES or Network Device Enrollment Service as a Role in Windows 2008, it has been available as add-on for Windows 2003, too.
NDES
So, NDES sounds pretty cool, but what is it, you may wonder. It’s Microsoft’s implementation of SCEP or Simple Certificate Enrollment Protocol, which is a PKI communication protocol that leverages existing PKCS#10 and #7 technology over HTTP. It provides a simple means of requesting and issuing digital certificates across different devices and vendors.</p>
Installing NDES on Windows Server 2012
To use SCEP with your existing ADCS based PKI simply add the Role to the Server that provides CA Web Enrollment. I’m not going through the details of setting up a ADCS based PKI here, that might very well be a topic for a future post, though.
Add the Role using ServerManager or Windows PowerShell:
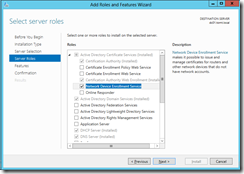
Install-WindowsFeature –Name ADCS-Device-Enrollment
Configuring NDES
After successful installation of the Role, ServerManager informs you that there is some sort of configuration required for the newly added feature.
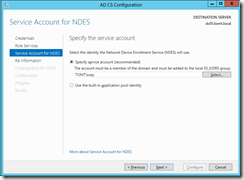
An AD user account is required for the NDES service to use. That account must be member of the local IIS_IUSRS group on the NDES Server. I created a user with the name of scep and added it to the group before starting the configuration wizard.
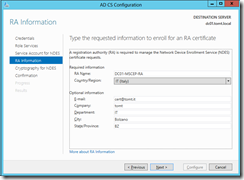
Fill in information required for the RA certificate. What happens here, is that the NDES Server is issued two Registration Authority certificates, which are then used for SCEP:
Configure cryptographic settings for the RA keys:
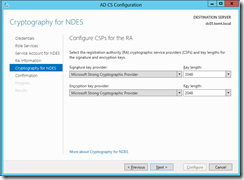
After reviewing the settings, and clicking Configure you will see the RA certificates in the personal store of the NDES Server:
![]() </p>
</p>
Configure NDES CA settings
The certificate template used by NDES defaults to IPSECIntermediateOffline, that can be changed by modifying the following registry keys:
HKEY_LOCAL_MACHINE\SOFTWARE\Microsoft\Cryptography\MSCEP
EncryptionTemplate
GeneralPurposeTemplate
SignatureTemplate
I decide to go with the WebServer template, so I update the registry and restart the certsvc service. Keep in mind, that the service-user account (TOMT\scep, in my lab) needs permissions to enroll for the selected certificate template. This can be configured using the Certificate Templates MMC Snap-In:
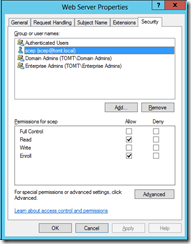
NDES requires a challenge for every certificate transaction, unfortunately there seems to be no such setting in Cisco’s SCEP implementation. That default can be changed by setting the following registry key to 0:
HKEY_LOCAL_MACHINE\SOFTWARE\Microsoft\Cryptography\MSCEP\EnforcePassword\EnforcePassword
Warning: This disables the need for a challenge, so that essentially anyone with knowledge of your NDES server can enroll for certificates.
Restart the certsvc service after modifying the registry:
Get-Service certsvc | Restart-Service
Configure NDES IIS settings
IIS request filtering sets the value for MaxQueryString to 2048 by default, a reasonable key length is at least 1024, more often 2048. You see the problem, that value needs to be changed in order to support strong keys.
Use appcmd to change the value for MaxQueryString:
%systemroot%\system32\inetsrv\appcmd.exe set config /section:system.webServer/security/requestFiltering /requestLimits.maxQueryString:"4096" /commit:apphost
If you don’t update MaxQueryString you will see error 404.14 Query string too long in the IIS log.
There is a really good guide to NDES on TechNet Wiki.
That’s it for the first part, our NDES on Windows Server 2012 is configured and ready to go. Stay tuned for part 2.
— Tom
